
Butter Pie Crust
How to Make the Perfect Pie Crust: A Foolproof Guide to Flaky, Buttery Success
If you're anything like us, there's something downright magical about making pie from scratch—especially when the crust is so good, it steals the show. And let's be honest, flaky, buttery pie crust can feel like a bit of a mystery. But once you understand the process, it's surprisingly approachable—and deeply satisfying. Since we're deep into fruit season and soon to be in holiday pie season, now's the best time to start mastering your crust game. Yes, there are a lot of steps in how to make the perfect crust, but none of them are difficult and taking the time to do this the right way will
Here’s everything you need to know to make perfect all-butter pie crust at home, from mixing to blind baking to crimping like a pro.
Start With the Right Dough: All-Butter, All the Way
This recipe is our go-to for flaky, tender crust—and it all starts with cold European-style unsalted butter, all-purpose flour, and a splash of ice-cold water and vinegar. No shortening. No fuss. Just pure, buttery flavor.
Ingredients
2 ½ cups (312 g) all-purpose flour
1 teaspoon (4 g) granulated sugar
1 teaspoon (4 g) kosher salt
1 cup (226 g) unsalted European-style butter, cold
½ cup (120 ml) ice-cold water-vinegar mixture, or more as needed
Vinegar Water
½ cup (120 ml) ice-cold water mixed with 1 tablespoon (15 ml) apple cider vinegar
Tip: I like to mix a larger batch in a mason jar and just keep it in the fridge. You may not need the full amount—add gradually until the dough comes together.
Instructions: How to Make All-Butter Pie Dough
1. Prepare your liquid.
In a small bowl or measuring cup, combine ½ cup (120 ml) cold water with 1 tablespoon (15 ml) apple cider vinegar. Stir and place in the fridge or freezer to chill while you prepare the dry ingredients.
2. Combine dry ingredients.
In a large mixing bowl, whisk together the flour, sugar, and salt.
3. Cut in the butter.
Add the cold, cubed butter to the flour mixture. Use a pastry blender (or your fingertips, working quickly) to cut the butter into the flour until the mixture resembles coarse crumbs with a mix of pea-sized and some slightly larger chunks. You want visible butter pieces—that’s what creates flakiness.
4. Add the liquid gradually.
Drizzle in the cold water-vinegar mixture, a tablespoon at a time, tossing the mixture with your hands or a fork as you go. Add just enough for the dough to hold together when squeezed—it should be slightly shaggy and not overly wet.
5. Bring it together.
Once the dough starts coming together, turn it out onto a lightly floured surface. Gently knead and press it into a single mass, working quickly to avoid warming the butter with your hands.
6. Divide and shape.
Split the dough in half. Shape each portion into a flat disc about 1 inch thick. Wrap tightly in plastic wrap or parchment and refrigerate for at least 2 hours, or up to 3 days. You can also freeze the dough at this stage for up to 1 year.
7. Roll and use.
When ready to use, let the dough rest at room temperature for 5–10 minutes before rolling out on a lightly floured surface. Rotate as you roll to maintain an even circle, aiming for about 12–13 inches in diameter for a 9-inch pie pan.
Pro Tip: Use a pastry blender to cut the butter into the flour, but don’t overwork it. You're aiming for visible pea-sized chunks. These will steam and puff during baking, giving you that layered texture.
Keep It Cold, Always
Temperature control is everything.
Use cold butter, cold water, and chill your dough before rolling.
After forming your dough into discs (or a disc + rectangle for lattice pies), wrap it tightly and let it rest in the fridge for at least 2 hours—or overnight. It helps the butter firm up to give you those flaky layers and helps the flour to fully hydrate resulting in a better crust.
Before rolling out, your dough should feel as cold and hard as the butter did going in.
Storage tip: Pie dough keeps in the fridge for a few days and in the freezer for up to a year. Always label and date!
Rolling Out Like a Pro
When it’s time to roll, bring the dough out of the fridge and give it a few bangs with your rolling pin to wake it up.
Lightly flour your surface.
Start in the center and roll out in all directions, rotating as you go.
Roll into a 12- to 13-inch round for a standard 9-inch pie.
Roll the dough over your pin, then unroll it into your pie tin.
For double-crust pies, trim the top crust to a 10-inch round, or 11 inches for galettes.
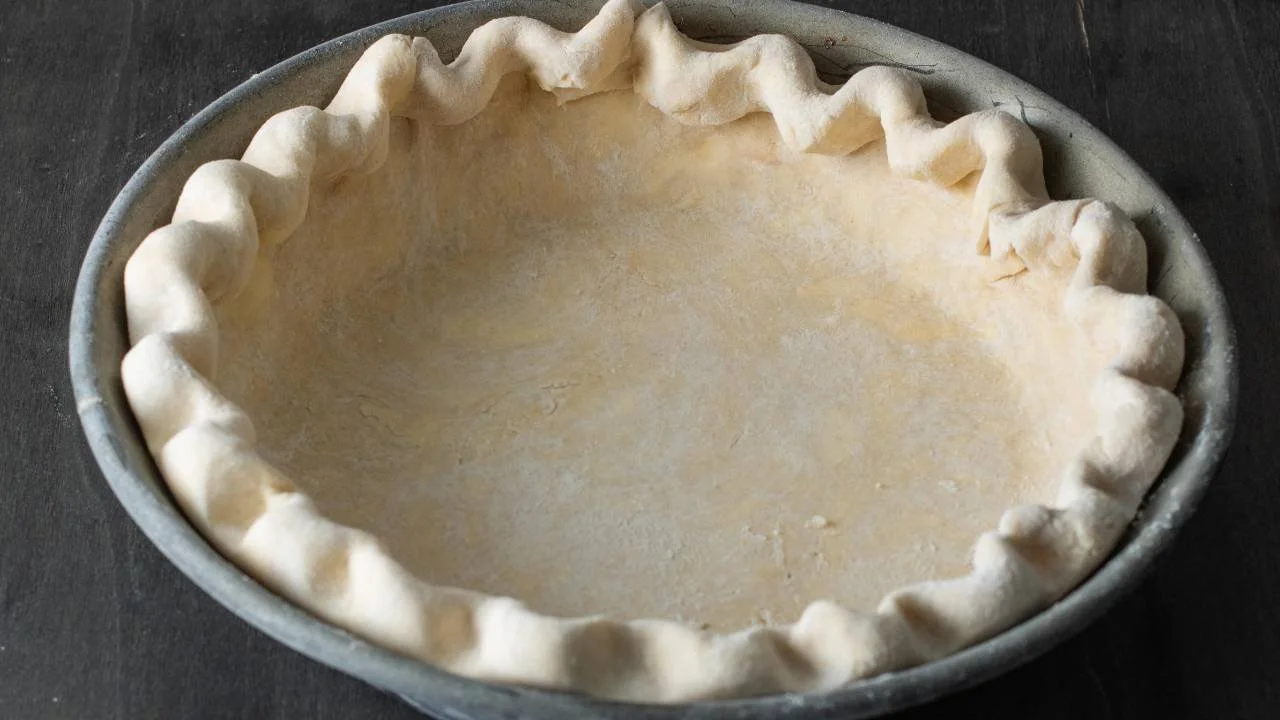
Let’s Talk Crimping
Crimping might make some of you start to sweat, but getting a good crimp is not as hard as it seems.
Place your chilled, rolled out dough into your pie pan. Roll the edges of the toward the center of the pie kind of how you would roll a cinnamon roll, tucking the edge into itself.
Then use your thumb and index finger to pinch the dough into a “C” shape, all the way around.
Freeze the crust for at least 15 minutes before baking to help the shape hold.
Blind Baking: The Secret to No-Soggy-Bottom
For single-crust pies, blind baking is essential—especially if your filling won’t be baked.
Here’s how to do it right:
Crimp and freeze your crust.
Preheat oven to 450°F.
Line the crust with foil and fill it to the top with dried beans (or pie weights).
Bake 25–27 minutes. The crimp should be just golden.
Remove foil and beans, and bake another 6 minutes to set the crust.
Extra Blind Baking: For lighter or custard based pies that don't have to bake as long as most fruits pies, go one step further. After removing the foil, brush the crimp with beaten egg and bake another 5–7 minutes until golden brown. Voilà.
Final Tips for Pie Crust Glory
Flour is your friend. Keep your surface floured to prevent sticking, but don’t go overboard.
Less is more. Stop mixing when the dough just comes together. Overworking creates toughness.
Plan ahead. Crust is best when given time to rest and chill. Make it a day before, and thank yourself later.
Ready to Bake?
You’ve got the tools, the tips, and the technique. Whether you're making a showstopping fruit pie or a humble quiche, this crust is your foundation. Roll it out with confidence, and don’t forget—pie is meant to be joyful, rustic, and perfectly imperfect.
Happy baking!