
Three Rhubarb Jam Recipes with One Simple Method
May 21, 2025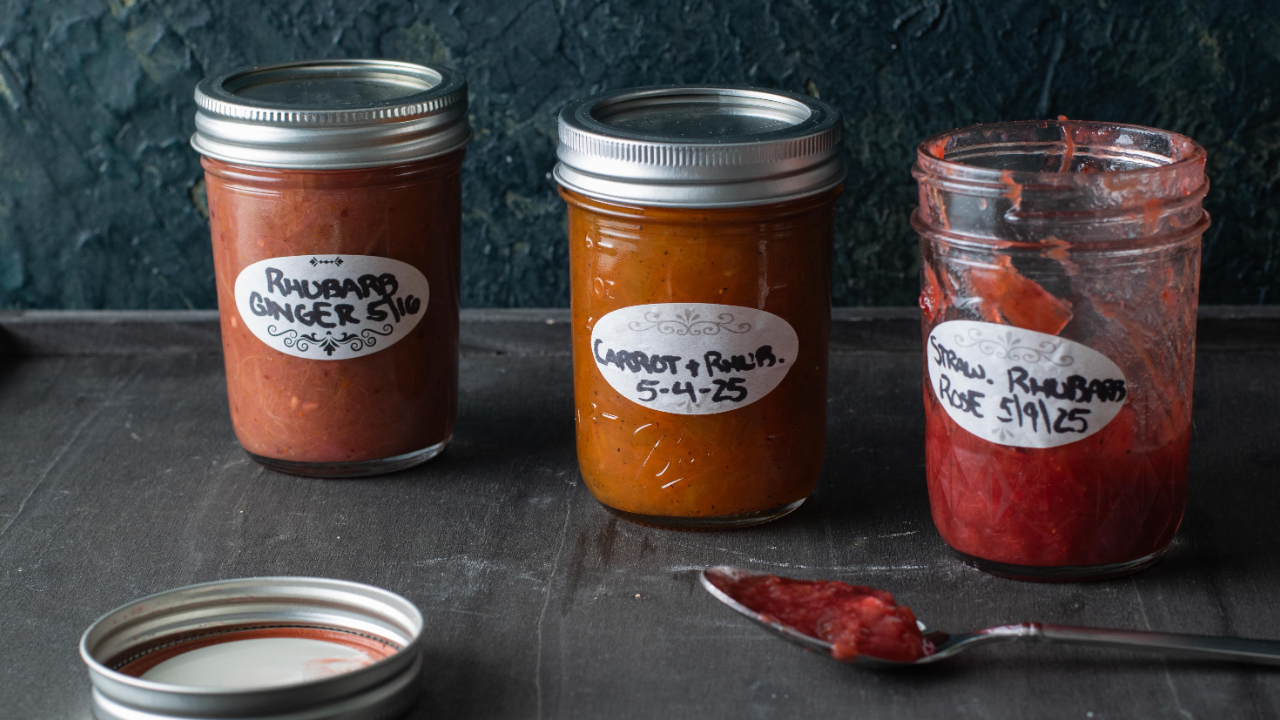
Rhubarb season offers the perfect excuse to fill your pantry with vibrant, tangy jams. For those of you with plants that have more than you know what to do with, its a great way to make delicious gifts or tuck away your harvest until this time next year. In this post, I’m sharing three distinct rhubarb-based jam recipes—each with its own flavor profile, but all made using the same, no-fuss method. Whether you're into the sweet-tart combination of strawberries and rose, the zesty heat of ginger and orange, or the earthy brightness of carrot and citrus, there's a jam here for every palate. Try one or try them all-they're absolutely delicious. The carrot and rhubarb jam is especially delicious-don't let the odd combo throw you off!
Rhubarb, Strawberry, and Rose Jam
Yield: 9 half-pint jars
2 pounds (900 grams) rhubarb
4 cups (600 grams) strawberries
Juice of 1 lemon (about 3 tablespoons / 45 ml)
1½ cups (300 grams) granulated sugar
1½ cups (300 grams) rose sugar or granulated sugar
½ cup (120 ml) blood orange juice, for color (optional)
Ginger and Orange Jam
Yield: about 9 half-pint jars
2 pounds (900 grams) rhubarb
Zest of 2 oranges
2 cups (480 ml) orange juice or blood orange juice
4 cups (800 grams) granulated sugar, or more as needed
Juice of 1 lemon, or to taste (about 3 tablespoons / 45 ml)
6 to 8 ounces (170–225 grams) fresh ginger, peeled, sliced thin, and finely grated
1 to 2 teaspoons (5–10 ml) vanilla extract (optional)
Carrot-Rhubarb Jam
Yield: 5 half-pint jars
Generous 1 pound carrots (450 grams)
About 1 pound rhubarb (450 grams)
Zest and juice of 2 oranges (about ⅓ to ½ cup / 90–120 ml juice)
Zest and juice of 2 lemons, plus more juice as needed (about 6 tablespoons / 90 ml)
4 cups granulated sugar (800 grams)
¼ to 1 teaspoon ground cardamom (optional) (0.5 to 1 gram)
1 tablespoon Fiori di Sicilia (optional) This is a very unique ingredient and one worth having in the pantry. If you don't want to try it, swap out vanilla extract and citrus extract in its place. Be aware there are 2 types on Amazon- one is a concentrated version from Italy that is just the oils, the other is a diluted version in alcohol. Personally, I opted for the concentrated oil one and reduced the measurement to 1 tsp instead of a tablespoon. It was more expensive, but you have to use less and the flavors are more pure.
Universal Jam Method
Place all ingredients for your chosen jam in a large, heavy-bottomed pot. Set the pot over medium-high heat and bring to a boil, stirring frequently. Once boiling, reduce the heat to maintain a steady simmer. Stir often to prevent sticking and scorching, and skim off any foam as it forms.
Cook until the fruit breaks down and the mixture thickens. To check if it’s done, spoon a small amount onto a chilled plate. After one minute, run your finger through the center—if the line holds and doesn’t fill back in, the jam is ready. If not, continue simmering and test again.
Ladle the hot jam into sterilized jars, leaving ¼ inch (6 mm) of headspace. Wipe the rims clean, seal with lids, and process the jars in a boiling water bath for 10 minutes (adjust for altitude if needed). Let cool completely before labeling and storing. Store opened jars in the refrigerator.
How to Sterilize Jars and Finish Canning Your Jam
Properly sterilizing your jars and finishing the canning process ensures your jam is shelf-stable and safe to store for months. Here’s a simple guide to walk you through the steps:
1. Wash the jars and lids:
Start by washing your jars, lids, and rings in hot, soapy water. Rinse them well. Alternatively, you can run them through a hot dishwasher cycle.
2. Sterilize the jars:
Place clean jars right-side up in a large pot or canning pot and cover them completely with water. Bring the water to a boil and let the jars simmer for at least 10 minutes. Keep the jars hot until you're ready to fill them—this helps prevent breakage when the hot jam is added.
3. Heat the lids:
Place the lids (not the rings) in a separate small saucepan with hot—but not boiling—water. Let them sit in the hot water while you prepare the jam. This softens the sealing compound. (Some modern lids no longer require this step—check the manufacturer’s instructions.)
4. Fill the jars:
Use a jar funnel to carefully ladle the hot jam into your sterilized jars, leaving ¼ inch (6 mm) of headspace at the top. Wipe the rims clean with a damp cloth to remove any residue.
5. Apply the lids and rings:
Place a warm lid on each jar, then screw on the ring until it’s fingertip tight—secure, but not overly tight.
6. Process the jars in a boiling water bath:
Place the filled jars back into the canning pot, making sure they are completely covered with at least 1 inch (2.5 cm) of water. Bring to a rolling boil and process for 10 minutes (adjust time if you’re at high altitude).
7. Cool and store:
Carefully remove the jars with a jar lifter and set them on a towel-lined surface. Let them cool, undisturbed, for 12 to 24 hours. You should hear the satisfying “pop” of the lids sealing as they cool.
After cooling, check that the lids are sealed by pressing the center—if it doesn’t move, it’s sealed. Label the jars with the date and contents, then store in a cool, dark place. Refrigerate after opening.
Hey there! Just a heads-up—this recipe includes some affiliate links. That means if you buy something through one of my links, I might earn a small commission (at no extra cost to you). I only recommend products I truly love and use myself. Your support helps me keep creating delicious recipes and sharing them with you. Thanks so much!
Stay connected with the latest posts, recipes & events!
Join our mailing list to receive the latest news and updates.
Don't worry, your information will not be shared.
We hate SPAM. We will never sell your information, for any reason.
Categories
All Categories 15 minute recipe 30-minute recipe 4th of july dessert 9x13 dessert about buckwheat acidity in cooking afternoon tea dessert agrodolce agua de jamaica alcohol all butter pie dough almond crumble almond flour almond flour muffins almond paste cookies almond salad almonds americano cocktail aperol spritz appetizer ideas appetizers apple and cheddar pairing apple cider glaze apple cranberry crisp apple galette recipe apple galette with cheese apple muffins apple salad apple spice blend apricot apricot galette apricot mayo apricot mustard apricot scones aromatic spices asparagus pasta asparagus recipe asparagus recipes asparagus tart autumn baking autumn baking recipes autumn dessert ideas backyard dining bacon bacon fat recipes bacon gougères bacon potato soup bacon recipes baharat baharat recipes baharat spice blend baharat yogurt baked custard baked potatoes baking baking basics baking from scratch baking guide baking tips baking with buckwheat baking with rye banana banana bread banana bread recipe bar cookies barbecue bars basil and chive garnish basil recipes bbq rub beef recipes beef stew beet recipe beets bellini cocktail berry desserts best pumpkin spice recipe best white wine for spring blind baked crust blind baked tart bloomsdale spinach blue cheese recipes blue cornmeal blueberry muffins bourbon cocktail boutique champagne braised beef brassica bread pudding breakfast muffins breakfast pastry breakfast recipe brine brine for roast turkey brioche recipe brioche rolls brisket broccoli brown butter brown butter bourbon brown butter glaze brown butter pie brown sugar glaze brownie recipe brownies brunch brunch cake brunch ideas brunch potato dish brunch tart brussels sprouts with bacon bubbly wine buckle cake buckwheat buckwheat carrot cake buckwheat dough buckwheat flour buckwheat muffins buckwheat pancakes buckwheat recipes bulk buying burrata appetizer burrata recipes burrata salad butter cookies butter crust buttered potatoes buttermilk brioche buttermilk cake recipe buttermilk cornbread buttermilk crust buttermilk dessert butternut squash casserole buttery cake buttery pastry buttery vegetables cabbage pancake cabbage recipe cabbage recipes cabbage rolls cake cakes campari drinks candied pecans canning canning recipe cantaloupe gazpacho caraflex cabbage caramelized pineapple cake cardamom cardamom dessert carrot and beet salad carrot cake carrot ginger soup carrot jam carrot recipe carrot rhubarb jam carrot soup carrots cast iron cornbread cedric bouchard celeriac mash celery salad chablis spring pairing chai spiced cookies champagne charentais melon cheddar apple galette cheddar biscuits cheddar cheese recipes cheddar rye crust cheese puffs cheesy potato bake chef life chef sommelier chef-inspired cherries in the snow cherry cherry and chocolate cherry compote cherry crisp cherry dessert cherry desserts cherry rhubarb recipe cherry trifle chewy cookies chewy oat cookies chewy snickerdoodles chicken soup chiffon cake childhood favorites chili chili cheese broccoli tart chili cheese tart chili lime corn chili recipe chillable red wine chilled soup recipes chive recipes chocolate chocolate creme brulee chocolate dessert chocolate pecan pie chocolate pie recipe chocolate pots de creme chocolate recipe choosing wine christmas baking christmas cookie tray christmas cookies christmas dinner christmas recipe chuck roast cilantro cinnamon bread cinnamon buns cinnamon cookies cinnamon pecans cinnamon rolls cinnamon substitute citrus and beets citrus curd citrus ginger vinaigrette clafoutis classic cookies classic meatloaf classic upside-down cake cocktail garnish cocktail gift cocktail mixer cocktails with fruit cocoa cookies coconut milk soup coffee cake spice coffee pairing coleslaw alternative collard greens comfort food condiment condiments cookie cookie press recipe cookie swap cookies cooking cooking tips cooking with fat cooking with rhubarb cooking with the seasons coriander corn and nectarine pie corn recipes corn ribs corn salad cornbread dressing cornbread muffins corned beef corned beef brine cornmeal biscuits cornmeal streusel cornmeal zucchini cakes costa rican drinks country ham recipes cozy bakes cozy dessert cozy fall cookies cozy fall desserts cozy fall recipes cozy meals cozy vegetable dish crackers cranberry brine cranberry pecan pumpkin oat cookies cranberry recipes cranberry sauce cranberry vinaigrette cream cheese mousse cream cheese pastry cream cheese tart creamed corn creamy dessert creamy grits creamy mashed potatoes creamy pasta sauce creamy potato dish creamy rice pudding creamy salad creamy soups creamy tahini dressing creamy tart filling creme brulee crinkle cookies crisp recipe crisp topping recipe crispy potato pancakes crispy vegetable fritters crowd-pleaser crumb cake crunchy salad crème fraîche crémant csa recipes cucumber salad culinary arts culinary creativity curry soup custard custard desserts custard pie dairy-free sauces dairy-free soup dark chocolate pie delicata squash recipe delicate cookies dessert dessert basics dessert recipe dessert topping dessert wine diaspora chai spice different salt dinner recipe dinner rolls dipping spices diy pumpkin spice mix dressing base dried cranberry cookies dry rosé dry rub dukkah recipe early fall wines early spring produce early spring vegetables easter baking easter brunch easter dessert easy baking easy braised meat easy brioche easy cake easy cake from scratch easy dessert easy dinner easy dinner recipes easy elegant vegetarian easy fruit cake easy galette recipe easy jam recipe easy latke recipe easy lunch ideas easy make-ahead sauce easy panna cotta easy peach pie easy peach recipe easy pie easy pumpkin loaf easy pumpkin spice mix easy recipe easy recipes easy salad dressing easy salad recipe easy salads easy sauce recipes easy savory tart easy side dishes easy sorbet recipe easy soup recipe easy spring dinner easy spring recipe easy summer desserts easy summer dishes easy summer recipes easy upside down cake easy upside-down cake recipe easy vegetable recipes easy vegetable sides easy vegetables easy zucchini recipe eating seasonally edible decorations edible gifts elegant dessert elegant desserts elegant entertaining elegant side dish elotes off the cob esquites european cocktails european red wines european wine everything spice fall baking fall baking recipes fall cake recipe fall cocktails fall cookie recipes fall desserts fall food and wine fall muffin recipe fall recipes fall salads fall soup fall soup recipe fall spice blend fall vegetarian recipes farm fresh farm to table farm-fresh cooking farm-to-table baking farm-to-table recipes farm-to-table wine pairings farmers market farmers market baking farmers market cooking farmers market finds farmers market recipe farmers market recipes farmers market salad farow at home farow at home recipes farowathome fava top sauce fennel salad festive condiments festive dessert toppings festive salad feta salad fine dining flaky cookie recipes flaky crust flaky pie crust flavor balance floral dessert flourless chocolate cake food and wine food and wine pairing food lovers food preservation food science franciacorta frappato freezer-friendly baking freezer-friendly dessert french appetizer french baking french melon french wine french-inspired fresh and local recipes fresh apricots fresh corn fresh corn recipe fresh fruit dessert fresh fruit recipes fresh herb pasta fresh herbs fresh milled cornmeal fresh nectarine recipe fresh peach recipe fresh pineapple upside-down cake fresh produce fresh salad fresh salad recipes fresh summer recipes fresh tomato recipe fresh vegetable pasta fridge cleanout recipe fried corn from scratch from scratch baking from scratch cooking frozen desserts fruit and chocolate fruit butter cookies fruit cobbler fruit compote fruit crisp fruit dessert fruit galette fruit mustard fruit pastry fruit pastry recipes fruit pie fruit sauce fruit tarts fruit topped cake 2/2 furmint wine suggestions galette gamay garden tomatoes garden zucchini recipes garden-to-table garnacha gazpacho recipes gelatin dessert ginger cookie ginger orange jam ginger peach cake ginger recipes ginger rhubarb sorbet ginger upside down cake glaze global flavors gluten free gluten free baking gluten free dessert gluten free pumpkin cookies gluten free recipe gluten-free gluten-free baking gluten-free dressing gluten-free muffins gluten-free recipes gluten-free salad gluten-free side gluten-free sides gluten-free soup gluten-free thanksgiving gluten-optional goat cheese salad goat cheese tart golden brown potato cakes good wine gooey pie filling gougères recipe gourmet cooking graduation wine grain bowl recipes grain free dessert grain salad greco di tufo green garlic green garlic recipes green onions green sauce greens with vinegar grenache grenache rosé grilled corn grilled sweet potatoes grilled vegetables grilling grilling wine grits ground beef ground beef recipes grower champagne gruyère gougères grüner veltliner grüner veltliner food pairing hakurei turnip ham and potato soup hand pies healthy healthy comfort food healthy dinner healthy dressings healthy gazpacho healthy homemade soup healthy lunch healthy muffins healthy pumpkin spice blend healthy salad healthy salad recipes healthy salads healthy side dishes healthy summer sides healthy zucchini fritters hearty meals hearty vegetarian heirloom tomato recipe heirloom wheat herbal tea herbed goat cheese herby sauce hibiscus tea holiday holiday appetizers holiday baking holiday bread holiday casserole holiday cocktails holiday cookie recipes holiday cookies holiday dessert holiday entertaining holiday food holiday garnish holiday main course holiday pie holiday pies holiday salad holiday side dish holiday side dishes holiday sides holiday snacks holiday treats home baking home cooking home cooking with wine homemade angel food cake homemade baking blend homemade brioche homemade carrot cake homemade dessert homemade icing homemade jam homemade meatloaf homemade mustard homemade pie homemade pie crust homemade pineapple cake homemade poptarts homemade potato fritters homemade pumpkin spice blend homemade rugelach homemade sauce homemade seasoning homemade sorbet homemade soup homemade spice mix homemade toaster pastries homemade vinaigrette honey butter rolls honey roasted carrots how chefs think how to brine turkey how to make pie dough how to make pumpkin spice ice cream topping ice pop recipes iced tea individual tarts infused spirits ingredient spotlight ingredients iodized salt israeli food italian italian aperitivo italian cocktails italian cooking jam recipes jam rugelach jam with grams and cups jam-filled pastries japanese food jewish baking recipes juicy turkey recipe kitchen wisdom kofte kohlrabi kohlrabi recipes kosher salt lambrusco late summer cooking late summer recipes latke-style pancakes layered dessert learn about buckwheat lemon lemon cardamom lemon curd lemon pasta lemon vinaigrette light lunch light red wines lime vinaigrette linguine recipes local food local seasonal eating loire valley wine make ahead brunch make ahead cocktail make ahead dessert make-ahead make-ahead dessert maple glaze maple pecan cake maple pumpkin pie maple sherry glaze maple syrup cake marinade mashed potatoes mayo dressing mayo lime corn meal prep meal prep salad meal prep salads meatballs meatloaf recipe mediterranean cooking mediterranean flavors mediterranean food mediterranean-inspired mexican corn salad mid-bodied reds middle eastern food middle eastern recipes middle eastern spices middle eastern-inspired mint mint salad recipes moist bread moist carrot cake recipe molasses cookies moroccan salad mother's day wine mothers day mothers day brunch muffin recipe mustard recipe natural antioxidants natural wine naturally creamy negroni recipe no bean chili no cook recipe no cook recipes no cream no vanilla cookies no-churn sorbet no-cook rhubarb non-alcoholic north african food north african inspired north african recipe nostalgic baking nostalgic recipes nutty glaze oat topping okonomiyaki old fashioned recipe olive oil olive oil loaf one loaf recipe one pan cookie one pot meals one-pan meals orange blossom orange brine organic organic cooking organic desserts organic ingredients organic produce organic recipes organic spring recipes organic vegetables organic wine organic wine pairing organic wine pairings oven baked dessert oven baked skillet overwintered carrots overwintered spinach panna cotta pantry staples pappardelle recipes parmesan cream sauce parmesan salad parmigiano party appetizers party snacks pasta sauces pastry pastry cream pastry recipe pastry recipes pea tendril recipe peach bbq sauce peach bellini peach cobbler peach dessert recipe peach pie peach plum cake peach plum dessert peach recipes peach salad peaches and plums pecan oat cookies pecan pie with corn syrup peperonata pepper recipes perfect bottle of wine perfect pie dough pesto alternative pickled beet salad pickled beets pickled beets recipe picnic food ideas picnic recipe pie baking tips pie crust pie tutorial pineapple dessert pineapple upside down cake pink wine pinot meunier pinot noir pinot noir rosé piping cookies pistachio vinaigrette plant-based plant-based recipes plum cake recipe polenta recipes pomegranate recipes pork and beef meatloaf port cranberry sauce pot liquor potato potato pancakes with yogurt potato puree potato recipe potato recipes pots de creme poultry brine preserved lemon preserving professional chef prosecco cocktails provence rosé pumpkin bread pumpkin oat cookies pumpkin pie pumpkin soup pumpkin spice cookies pumpkin spice for coffee pumpkin spice recipe queso fresco queso fresco recipes quick quick bread quick pasta dishes quick side dish radish greens radish recipes radish salad raspberries recipe recipe development recipes red wine for fall red wine for warm weather red wine sauce refreshing drinks refreshing recipes regenerative farming restaurant favorite rhubarb rhubarb condiment rhubarb crisp rhubarb dessert rhubarb desserts rhubarb dressing rhubarb ice pops rhubarb ideas rhubarb jam rhubarb recipe rhubarb recipes rhubarb recipes savory rhubarb sorbet rhubarb tart rhubarb vinaigrette rice pudding ricotta ricotta pie roasted beets roasted beets and citrus roasted fall vegetables roasted fruit roasted nuts recipe roasted pumpkin recipe roasted vegetable topping room temperature salad root vegetables rose desserts rose water roses de jeanne rosé wine ruby port recipes rugelach recipe rustic rustic apple tart rustic cooking rustic dessert rustic italian food rustic soup rustic tart rustic tea cake rye crust recipe rye flour dessert rye flour recipes sage bread recipe sage dressing salad dressing salad dressing with fruit salad with dressing salad with fruit salt salt and flavor salt variety sancerre sandwich spread sauvignon blanc sauvignon blanc recipes savory brunch recipe savory cobbler savory pastry savory pie savory spread savory tart savory zucchini pancakes savory zucchini recipes scandinavian cookies scone recipe scratch baking sea salt seafood pairing seared sprouts seasonal seasonal baking seasonal cocktails seasonal condiment seasonal cooking seasonal cooking ideas seasonal dessert seasonal desserts seasonal eating seasonal fruit seasonal fruit baking seasonal produce seasonal recipes seasonal rhubarb seasonal salad seasonal swaps seasonal sweets seasonal tart seasonal vegetables seasonal wine guide seasonal wine picks seasoning blend september baking ideas sgroppino recipe shortbread fruit cake shortcake topping side dish side dishes silky potatoes